Video: Adding Dimension with Paper

Hey, everyone. Thanks for coming by. It makes me so happy when people visit my little world. 🙂

Today I have a video for you showing how to add dimension to a simple card using nothing but stamps and paper.

(Supplies are listed in thumbnails at the end of this post.)

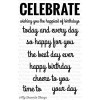
This technique is a great way to make a great stamp shine, such as this new My Favorite Things Celebrate stamp. (You can get it FREE by spending $60 there.) A great basic set.

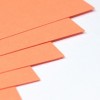
Just layer up 5 or 6 layers of red cardstock behind a portion of the stamped image and viola! Paper dimension… with a pop of fun color from the side.

I also added shine to “celebrate” with Wink of Stella. I stamped “happy birthday” with black ink, but then decided I wanted it embossed, so I stamped on top of it with Versamark and added clear heat embossing.

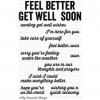
And here is another version of this technique. I like the first one much better but decided to share it anyway. I like this Get Well Wishes stamp set… needing it so much these days.

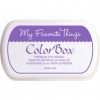
I used a mix of the My Favorite Things Inks here. The bright colors are great.

And here you can see the color peeking out…

As I mentioned, I used some of the new My Favorite Things stamps on these cards. If you are interested in seeing more from their new release, you can see them HERE at My Favorite Things (where their inks and papers are sold exclusively and you can get a free stamp set when you spend $60) or HERE at Simon Says Stamp along with other supplies I used here.

Thanks for stopping by. I gotta get back to making my Christmas cards. EEK! 🙂

SUPPLIES

Below are the products featured above. To find them at Simon Says Stamp, click on the SSS below the thumbnails. For Ellen Hutson, click on EH and for My Favorite Things, click MFT…


Hero Arts Black Dye Ink (SSS|EH)


Versamark (SSS|EH)


Hero Arts Clear Embossing Powder (SSS|EH)


Neenah White Cardstock 25 Sheets (EH|SSS)


Stamp Positioner (SSS|EH)


EK Success Powder Tool (SSS|EH)


T-Ruler (SSS|EH)


Hero Arts Milwaukee Heat Gun (SSS|EH)


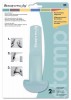
Tombow Stamp Runner Adhesive (SSS|EH)


Fiskars Premium Cut Line Trimmer (SSS|EH)


Wink of Stella Clear Glitter Brush Marker (SSS|EH)


Leave a Comment

68 thoughts on “Video: Adding Dimension with Paper”

  1. Karen M says:

    Love your gorgeous cards Jennifer and what a fun technique! Thanks for always sharing your creative world with us – Merry christmas to you and your family – hugs xx

  2. Jen Demmon says:

    Very cool technique! Thanks for the video.

  3. diane m says:

    Thanks for sharing this cool technique. Can’t wait to try it out. Maybe on some of my Christmas cards that still aren’t done yet!

  4. Tamara says:

    Great cards Jennifer thanks. I like how you are onto just regular cards, and this poor planner is still pushing holiday cards out, grrrr.

  5. Dawn Y. says:

    Thank you for sharing this great technique, Jennifer!! You’re the best!

  6. Celise McLaughlin says:

    I tried this technique, instead of using several layers of card stock, I used one layer of colored craft foam, the card came out great. Thanks.

  7. Renuka says:

    Tried this last night… after watching the video again 🙂 … mine is not as good as yours. But I am a happy gal !! Thank you so much for the tuts.

  8. Alice Wertz says:

    such a cool technique! thanks so much for the video, Jennifer!

  9. Trish Reddick says:

    I love these cards, but most of all I love the tip of stamping in black, then stamping again with Versamark and embossing with clear powder- brilliant. no stray little black specs! Thanks Jennifer!

  10. Nancy Bowen says:

    I just watched this video again!! Actually I have watched several times. I love this technique and my mind is spinning with all kinds of ideas that this could be used with. Thanks for sharing your world with me. God Bless you!

  11. Nancy Bowen says:

    I just watched this video again!! Actually I have watched several times. I love this technique and my mind is spinning with all kinds of ideas that this could be used with. Thanks for sharing your world with me. God Bless you!

  12. Loving these mix and match cards. Great technique and a wonderful way to make a lovely set of cards for a gift. TFS!

Leave a Reply

Your email address will not be published. Required fields are marked *