Fixing & Avoiding Warped Die Cutting Plates

Hello! Today I am sharing some (hopefully) helpful information on fixing and avoiding warped die cutting plates.
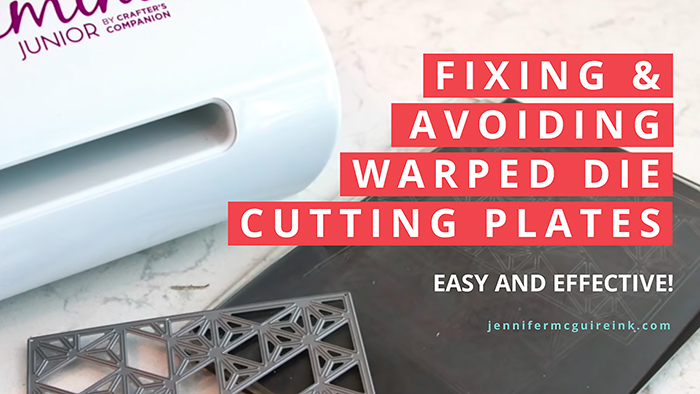
Fixing Warped Die Cutting Plates Video By Jennifer McGuire Ink

[If the video isn’t showing up, click HERE to watch it. All supplies are linked to multiple sources in the thumbnails at the end of this post. Compensated affiliate links may be used at no cost to you and product disclosure is below. As always, I appreciate your support of my videos!]

For more information on the die cutting machines (for wafer thin dies and embossing folders), please visit THIS video.

Be sure to watch the video for lots of tips. I hope this info is helpful!

PRODUCTS FEATURED

Want to find the products I used? I have listed them below. (Compensated affiliate links used at no cost to you. Thank you for your support! Affiliate and product disclosure can be found here. All machines and plates were personally purchased. Some dies shown were received from the company with no expectation. As always, I was not paid to do this post nor am I on any design teams. I only use products I love!) Click on the icons below each product picture to go to a favorite store.

Gemini Double Sided Cutting Plates
[ SSS ]
Gemini Junior Plates
[ SSS ]
Gemini Junior Die Cut Machine
[ SSS ]
Anna Griffin Empress Die Cut Maachine
[ ANN ]
Spellbinders Platinum 6 Die Cut Machine
[ SSS | SPL ]
Spellbinders Petite Floral Potpourri…
[ SSS | SPL ]
Memory Box Thanks Cursive Script…
[ SSS ]
Lawn Fawn Tropical Leaves Dies
[ SSS | LWN ]
Altenew Diamond Frame Cover Die
[ SSS | ALTN ]
Clear Packing Tape
[ AMZUS ]
Easy See Tape
[ SSS | DSG ]
ManiMe Can You Believe Nails
[ MNM ]
ManiMe Ocean Air Nails
[ MNM ]
Dashing Diva Blue Violet Glaze Nails
[ LNK ]
Lily and Fox Groovy Baby Nails
[ LLN ]


Leave a Comment

84 thoughts on “Fixing & Avoiding Warped Die Cutting Plates”

  1. Charlotte Cosci says:

    You’re amazing. Thank you for all this great info. I have the Gemini Jr. Great machine. Thank you, Jennifer.

  2. Lisa Henke says:

    Brilliant. You are brilliant ❤️❤️

  3. Holly Paplow says:

    Thank you so much for the helpful tips! I appreciate them so much!

  4. Maggie B says:

    Very helpful info, Jennifer. Thank you.

  5. Debbie Bradford says:

    Thank you for all of your expertise. I have found, out of desperation and experimenting, I can place a protective cloth over the warped plate and use my regular iron with pressure. It irons completely flat as it softens the plastic like the hot water.

  6. Andrea P says:

    Thanks, very helpful. I definitely will try. I’ll let you know my results from the plates used on my Sizzix Big Shot.

  7. Jcqlne says:

    What great timing. I very much appreciate your effort to help people make most of what they have. Thank you for sharing so much valuable information! God Bless.

  8. auntie em says:

    Very interesting video and I appreciated your hubby explaining why the boiling water method worked best. I was wondering if he had an explanation for why the double plate system you used works to prevent the warping? It would be interesting to know why and maybe the manufacturers could learn something too.
    I have been using something along the same idea as your green gemini plates but since we don’t have any access to the plates in our rural area, I use this inexpensive, not to mention free, substitution. A crafty friend, who does a lot of die cutting, suggested I try using piece of thin plastic to sandwich with my dies. Just plain plastic like shopping/disposable bags or the clear plastic from around the paper collections. Cut to size and put over the die before cutting. Doing this seems to have stopped, or at least slowed down, the warping of my plates, makes tricky dies cut better and the paper release better from the dies. I use a clear cutting plate, paper, thin die, plastic, clear cutting plate sandwich. I was amazed at how well this worked! I had some dies I was ready to chuck in the garbage since they woudn’t cut, even after trying every trick in the book. This method made them cut out perfectly!
    Thanks for sharing your excellent videos! 🙂

  9. Donna Phelan says:

    I should totally do this…I’m sure at some point we all need to lol TFS and explaining. Dynamic Duo!

  10. Great information as always!
    I have a warped plate that I haven’t tossed yet. I will try this to make it workable again.
    I was making the butterfly with the Gemini hot foil machine that you demonstrated
    It turned out great, but because of how think the butterfly die is, it warped my plate.

  11. Nancy Lee says:

    Thank you so much for this demonstration!!! I have had some difficulty with cutting plates so you made my day. This is wonderful!!

  12. Hope+Mitchell says:

    Thank you for being tuned in to problems we crafters experience. I am married to a CE nerd and love everything about his nerdiness! He enjoyed the lingo from a fellow CE! I just want to know how to get most use out of my crafting buck!

    Love all the things you do that are above and beyond crafting.

  13. hgjones says:

    Great tips. Thank you so much.

  14. Betsy says:

    You are my go to for information. Thank you so much!

  15. Amy says:

    Great information!
    Will those double sided gemini green plates work with other brand machines?

  16. Carol L Wineman says:

    Your tips are always so timely and helpful. Thank you so much

  17. Debbie+Titus says:

    Thank you😁

  18. Yvonne Boucher says:

    Thank you for this tutorial….good to know!

  19. Donna says:

    I have a metal shim that has a big bend in it, and I can’t figure out how to straighten it. Maybe it can’t be fixed? Wonder if the heat method for fixing plates might work?

  20. Kathy Sheely says:

    Thank you Jennifer!! This is so helpful. I’ve decided that it’s time to upgrade and have another cutting machine, one that’s electric. Appreciate all you time and research.

  21. Patricia Wilson says:

    This was very helpful. The only method I’ve ever seen for correcting warping was to wrap the two plates in foil, put them in a baking pan, add some weight to the top and put the oven on 250 and bake for about two hours. Then you let them cool naturally, unwrap and they are done. Also, can get allot of that paper from the cuts with this method. Your method seems more easy and faster. Thanks for sharing that with us as the plates are expensive if you have to keep replacing them.

  22. Loni Reynolds says:

    As usual, this is a very helpful video. Thank you so much for creating it and helping the rest of us. I always appreciate your kindness.

  23. jayn converse says:

    Hello Jennifer
    I tried the boiling water hack and it WORKED!!! Thank you so much for this tip, it will save me LOTS in not having to
    purchase new plates right away like I used to. I also tried on Sizzix plate and BAM Thank you thank you thank THANK YOU

  24. Carol Henderson says:

    Your blog and and posts are always the first ones I open because I know you will have the most interesting information. And of course, the best new products!

  25. Lisa+Johnson says:

    Jennifer
    Thankyou very much for this tutorial. I have been wanting to get an electric machine due to arthritis but have been hesitant due to crafters having problems with the plates. I now know that I can safely look into it
    Lisa

  26. Marcia+L+Kaczmarek says:

    I am soooooo going to try this. Thanks Ken for the explanation.

  27. Laurie Pickerel says:

    Excellent ideas – thank you for this! Loved that your husband provided the technical background too. I have cooked my plates in the past and it didn’t smell great so this is a MUCH better option.

  28. Vickie+Graham says:

    Thank you so very much…super informative!!

  29. Dana+Myers says:

    Working today on the warped plates I had saved (I AM my mother’s daughter!) and having success with both shims and plates. Yay! Thanks, as always, for sharing your research and great ideas.

  30. Vic Vaughan says:

    Thank you so very much, my hero once again!

  31. Gayle+Perona says:

    I look forward to every post, Jennifer, and was really excited about this one. However, I have tried it twice and it does not seem to work for my warped Cuttlebug plates. I, too, am at a lake in the high altitude (over 7,000 ft.) in Arizona. I am wondering if the lower boiling temperature could be the problem. I will try again when I return to our home in the desert and see if I get a better result.

  32. Jan Castle says:

    Wonder if the Gemini green plates would work with other machines…like the Vagabond 2?

  33. Henriette says:

    Thank you so much Jennifer and your hubby for the great video, I will try this that’s for sure.
    The explanation was clear and how to do also.
    I have two plates that are so curved but to good to throw away..
    Stay safe and have a wonderful day.

  34. Lani Westover says:

    Thank you! Was wondering if you have you tried the boiling water on the double sided die plates yet? My double sided die plates have not warped. But, was wondering for cleaning out the little paper pieces.

  35. Maggie zabela says:

    Do you recommend the green double sided plate tapped together method. Over the tapping together your old method of tapping the plastic shim to the plates? Thanks

  36. Marilyn says:

    What an amazing fix! I have two old Cuttlebugs just hanging out in my craft room. I only have a couple of the B plates and one of each of the others. The Bs were pretty warped so they have been getting your boiling water treatment this afternoon just so I have a backup system.

    Thank you so much!

  37. Melanie Ayers says:

    Thanks so much!!! Absolutely going to try this ASAP. And I’ll be buying a pair of the double sided cutting plates too. I’ve tried various items, cutting mats, the metal shim, everything and none of them seem to help. In fact the cutting mats made it worse I found. Looking forward to seeeing some new life in my warped plates 🙌🏻🙌🏻🙌🏻

  38. Michele+W says:

    Great video! I really appreciate all the tips for avoiding warping and for fixing warped plates. I had no trouble understanding your “resident nerd’s” explanation but then I’m a bit of a nerd, too. I found his explanation to be interesting and informative so tell him I said thanks. Thanks to you both! Now I’m off to boil some water to see if I can fix my badly warped cutting plates.

  39. Mollie says:

    Jennifer, you are the best! From the first time I used my Spellbinder and it warped, I have thought there must be a way to take the sway out of them. I tried flipping them over and leaving them pressed in the machine but I don’t think it helped. I love that you are so in-tune with what we all struggle with. I appreciate you and your husband’s time to help us take the sway out of our cutting plates. Thanks a million!

  40. Evelyn Spikes says:

    My boiling water must not be as hot as yours!😉 I’ve tried it 3 times with no positive results. I’m going to watch the video again.

    1. Lisa McDonough says:

      Try adding salt to it. Takes longer to boil but gets hotter.

    2. I did the same thing….3 times even left them overnight the last time but they are still warped, maybe a little better. I might try the ironing thing someone mentioned.

  41. Lisa McDonough says:

    Bought the double sided by accident! And almost threw out my old plates. Thank God I watch your videos every week. I have learned so much from you!

  42. TraciB says:

    Thank you so much! Completely worth the time you spent putting this together.

  43. viera says:

    fantastic video. its exactly what needed. thank you also oyour hubby for wonderful explanation and confirming why i was little hesitant to put them in the oven

  44. SBenson says:

    I tried this with my warped iCrafter’s self-healing mat and it worked great! Thanks, Jennifer!

  45. HI
    Thank you so much for this informative video. I have tried the dishwasher & the microwave, but your method just works wonderful.

    Linda in MI

  46. KT Hom says:

    Thank you two for this fabulous post….and thanks to your brainy husband for inventing GLAD Press N’ Seal, too, I believe!

  47. KT Hom says:

    I made a discovery awhile back that works so well when cutting intricate dies. Place a photo – picture side up or facing down (try both) as a shim under the paper to be die cut. After the die goes through your machine, many or all of the tiny waste pieces stick to the photo instead of the die – saving all that time poking out the unwanted pieces. I have loads of old photos, but you could also use photo paper cut to the size of your die if you desire.

  48. Victoria says:

    Definitely going to try this method. Thanks for sharing.

  49. Thank you Jennifer! I tried your technique & my cutting plates are much improved! Is there any way that we can email you privately? I want to talk about a specific product but I don’t want to put it out there for everyone to see.

  50. carol colclough says:

    there are a lot of good crafters out there but your videos and methods of teaching and narrating them, are the best out there. Your subjects are always up-to-date as far as what we need to know to make our wonderful hobby easier, less frustrating, more creative and beautiful. Thank you.

Leave a Reply

Your email address will not be published. Required fields are marked *