Ink Cube Tips & Techniques

Welcome! Recently I have been getting requests for tips on using mini ink cubes. I have several tips – and techniques – to share today!

Mini Ink Cube Tips Video by Jennifer McGuire Ink

[All supplies are linked to multiple sources in the thumbnails at the end of this post. Multiple stores are also linked in the parentheses following the product name. Compensated affiliate links used at no cost to you. To watch the video in HD on YouTube, click HERE.]

Ink cubes are becoming a more popular option these days. So I thought it was a good time to share tips on how to best ink with them… along with some techniques that can really only be done with the small pads!
Mini Ink Cube Tips Video by Jennifer McGuire Ink

For my first card, I did lots of diagonal stamping with the “love you lots” sentiment from the new Reverse Confetti Heart Filled Sentiments Stamp Set (SSS | RC). To help keep the messages lined up, I drew soft pencil lines with the help of my t-ruler.

To get the “ombre” look of three colors blended together on each sentiment, I taped together three ink cubes. I inked up the stamp by going back and forth a bit over the cubes… blending the colors where they meet. It works great! The Reverse Confetti Ink line (SSS | RC) is made up of lots of unique, vivid colors. And there is cardstock to match!

Mini Ink Cube Tips Video by Jennifer McGuire Ink

The main sentiment “you are so very loved” is from the Reverse Confetti Crazy About You Stamp Set (SSS | RC). I white heat embossed it on a die cut heart… with a scored cardstock strip underneath. Oh – and I used the Reverse Confetti Mouse Mail Stamp Set (SSS | RC) to decorate the envelope.

Mini Ink Cube Tips Video by Jennifer McGuire Ink

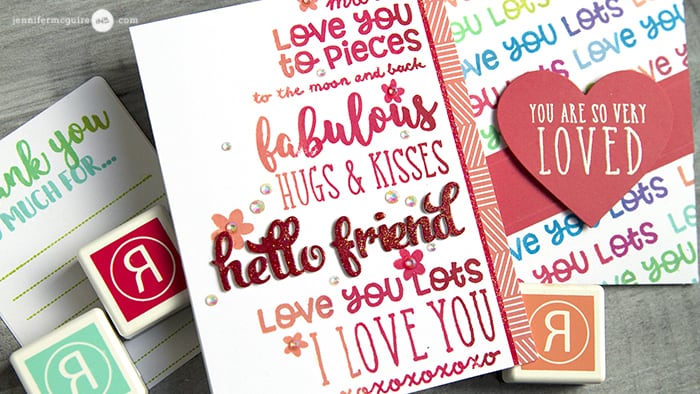
My next example shows how you can create a whole background of “ombre” sentiments with ink cubes. This card was inspired by others I made a long time ago. (You can see the video HERE. “Redoing” older designs is a way I get my crafty mojo back when it is missing.) All of the sentiments were inked with three ink cubes taped together. Love this look! The sentiments are from the Reverse Confetti Heart Filled Sentiments (SSS | RC), Crazy About You (SSS | RC), and Kindness Cards Stamp Sets (SSS | RC) and the flowers are from the Reverse Confetti Berry Sweet Stamp Set (SSS | RC).

Mini Ink Cube Tips Video by Jennifer McGuire Ink

On the edge of the card, I added a strip of Reverse Confetti Forever My Love 6×6 Paper (SSS | RC). For the main sentiment, I used “hello friend” die cuts from the Reverse Confetti Fancy Word Dies (SSS | RC). I stacked three layers together and inked the top with Salsa ink… and heat embossed with Hero Arts Sparkle Embossing Powder. Finally, I added Lucy’s Cards Iridescent Jewels.

Mini Ink Cube Tips Video by Jennifer McGuire Ink

Reverse Confetti also just released two great products that won my heart! The Reverse Confetti Kindness Cards Stamp Set (SSS | RC) and Kindness Cards Dies (SSS | RC) can be used to create quick notes for loved ones or folks in the community. What a great pick-me-up! Quick to make, but still handmade.

Mini Ink Cube Tips Video by Jennifer McGuire Ink

I also used multi-inking techniques for the sentiments on my “kindness cards.”

Mini Ink Cube Tips Video by Jennifer McGuire Ink

I hope these tips help you get more out of your ink cubes!

BLOG HOP

I am honored to be participating in a Reverse Confetti Blog Hop today… celebrating their newest release! Jen – the owner of RC – is one of my favorite people in the whole world. Her heart is the size of Texas! So I always enjoy using her products.

You can see the new Reverse Confetti release HERE at Simon Says Stamp or HERE at Reverse Confetti.

I am the last stop on the hop. You can start over at the blog of Amy Kolling!

SUPPLIES

Want to find the products I used? I have listed them below. (Compensated affiliate links used at no cost to you. Thank you! Affiliate and product disclosure can be found here. All products were personally purchased except those with an asterisk. As always, this post was NOT paid for or sponsored.) Click on the icons below each product picture to go to a favorite store.

Reverse Confetti Ink Cubes
[ SSS | RVR ]
Organize More Mini Ink Cube Trays
[ ORG ]
*Reverse Confetti Heart Filled…
[ SSS | RVR ]
*Reverse Confetti Kindness Cards…
[ SSS | RVR ]
*Reverse Confetti KindnesS Cards Dies
[ SSS | RVR ]
Reverse Confetti Crazy About You…
[ SSS | RVR ]
Reverse Confetti Mouse Mail Stamp Set
[ SSS | RVR ]
Reverse Confetti Fancy Word Dies
[ SSS | RVR ]
Reverse Confetti Berry Sweet Stamp Set
[ SSS | RVR ]
*Reverse Confetti Forever My Love 6×6…
[ SSS | RVR ]
Neenah Classic Crest 110lb Cardstock
[ SSS | ELH | AMZUS ]
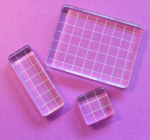
Catherine Pooler Acrylic Blocks
[ CTH ]
T-Ruler
[ SSS ]
Fiskars Premium Cut Line Trimmer
[ SSS ]
Microfiber Cloth
[ SSS | AMZUS ]
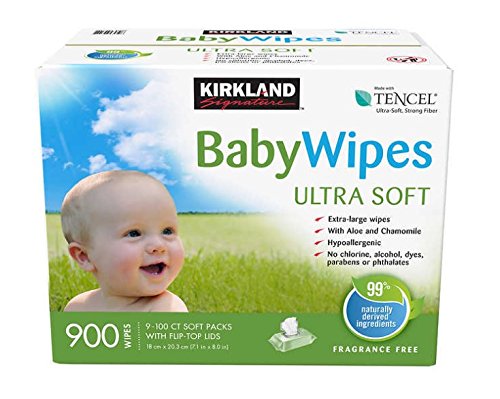
Kirklands Baby Wipes
[ AMZUS ]
Hero Arts Ultra Clean
[ SSS | HA ]
Simon Says Stamp White V Flap Envelopes
[ SSS ]
Kokuyo Long Dot Liner Adhesive
[ SSS ]
Tim Holtz Distress Collage Adhesive
[ SSS | ELH ]
Darice Ultrafine Tip Bottles
[ SSS ]
Hero Arts Sparkle Embossing Powder
[ SSS | ELH ]
Hero Arts Heat Gun
[ SSS | ELH ]
White Craft Foam
[ SSS ]
Lucy’s Cards Iridescent Jewels
[ SSS ]
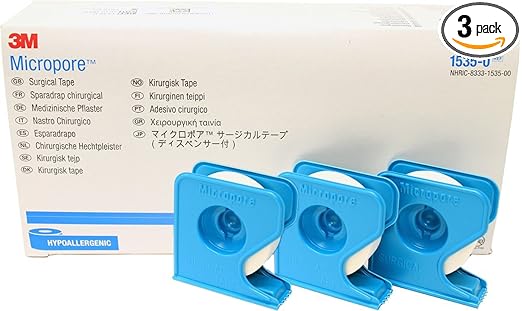
Micropore Tape
[ AMZUS ]
Scor-Pal Scoring Board
[ SSS ]


Leave a Comment

62 thoughts on “Ink Cube Tips & Techniques”

  1. Pennie Glasser says:

    I love all your cards! So much brightness and fun!

  2. FeM says:

    Thank you for sharing the different ways to use mini ink cubes to create awesome cards.

  3. Great tips and post, I have a ton of mini ink cubes. Thanks.

  4. Sabrina Radican says:

    What fabulous cards and such beautiful colors!!

  5. Lisa Henke says:

    wow! fabulous creations. so happy you are joining us on this hop. off to watch your video.

  6. Chris Handy says:

    Wow. You hit it out of the park with this technique. I cannot wait to try it and to show my friends. Love all you videos. You are my favorite designer. Thanks for sharing your love of stamping with us.

  7. Robyn - Autism Journey says:

    This is so cool! The RC colors are beautiful!! I’m in the market for mini ink pads so these are going to be it😀 The cards turned out SO lovely!! The kindness set is unbelievable!! What a great way to brighten someone’s day, I see these perfect for my sons teachers. I’m always trying to come up with teacher thank yous.

  8. valchic says:

    I so love your ideas and techniques.Love the confetti kindness card dies.

  9. Evelyn B says:

    Thanks for the tips with the small cube inks. I love the rainbow effect without cutting the stamps apart using the cubes. That isn’t anything that I’d thought about. Also the quick thank you cards – would be great to have on hand for all the wonderful nice things that people do for you. Would make a nice group of cards to give to someone in the rest home who wants to send a thank you to someone. Also love the three taped together to do ombre colors and to repeatedly stamp a variety of sayings. Really interesting cards and very unique that way. Thanks for the great tips Jennifer!!

  10. joyce c s says:

    Such bright and beautiful cards!!! Thanks so much for sharing!

  11. Sharon O says:

    Wonderful cards and excellent video, as always! I so appreciate your skills and your ability to teach through your work. Beautiful examples. Thanks for sharing and inspiring.

  12. Gorgeous work, always enjoy your creation! Thanks for sharing!

  13. Jennifer, I love what you’ve done!! I will need to play with words and colors — thanks for the inspiration!

  14. Carol Ross says:

    Fantastic cards, Jennifer. Thank you for the tip on using three ink cubes to ink up the sentiments.

  15. Krista D says:

    Love all these cards. I personally like mini ink cubes better than the larger ink pads. Thanks for sharing your creativity with us =0)

  16. susie sonnier says:

    You are so clever!!!

  17. Jennifer, I always love your cards. These are such fun and will put a smile on the face of the recipient for sure.

  18. Debs says:

    Thank you for all the wonderful tips. I love the direct stamping on the card front.

  19. Lagene says:

    Great tips and wonderful, colorful cards!

  20. ~amy~ says:

    Sooo pretty!!!!!

  21. KarenHale says:

    Really like using the mini ink cubes. Love your cards and thanks for the great inking tips.

  22. Debbie Barba says:

    Such fun cards Jennifer!~ I love them all! I think I need more sentiments!~ hee hee! Great tip about taping three colors of cubes together to get that ombre effect! I also like using the strip of patterned paper for interest because I have a ton of that in my stash! Thanks for another awesome video! You are always so inspiring!
    Have a wonderful day!

  23. weechi2 says:

    I have a question about your glue. I bought a bottle with a fine tip on it but can’t get the thick tim holtz collage medium out of the bottle would adding water to thin it ruin the collage medium?

  24. Joyce says:

    I love ink cubes! So much bang for your $! Love the matching envelope. That little stamp adds so much!

  25. Maureen Reiss says:

    These are all soooo FABULOUS!!!!

  26. As always Jennifer great techniques and hints for using mini cubes. Love all the cards you did, they are so fun.

  27. Sue Washburne says:

    Thanks, Jennifer! Looking forward to trying this technique out! 😍😍😍

  28. Kit A says:

    Wow! I love the ombre stamping you showed with the mini ink cubes. That is so cool. I cannot wait to try it. I have a lot of ink cubes.

  29. Carol McGregor says:

    As always your cards are unique and special. I started using my ink cubes this way for my families birthday cards this year. Thanks for the tutorial.

  30. Julie Haedtke says:

    Fun, Colorful cards! So awesome!

  31. Brenda says:

    Thank you for all the tips!

  32. Debbie P says:

    Great cards. I love the technique. That you for the great tips on using the mini ink cubes. I love the new release.

  33. Patricia Wilson says:

    Lots of great information on those cards and the techniques are great. I love those ink cube organizers and when checked I agree with you that they have a good price point. Thank you once again.

  34. Judy says:

    I think your idea using ink cubes together for an ombre effect is wonderful. I really liked how the results were on the cards. I also agree about purchasing the ink cubes over the original size is cost efficient. Thanks for the cool tips.

  35. Samantha Coleman says:

    Thank you, thank you, thank you for a video using the mini ink cubes! I recently decluttered my craft room only to discover that I had mainly left myself with mini ink cubes and donated the majority of my full size ink pads. So this is a very timely topic for me. I loved how you attached the ink cubes together to make your own ombré ink pads and your cards turned out beautifully!

  36. Julie says:

    Fun hop! Will try this out with mini cubes and “cat’s eye” cubes (yes, they are still juicy).

  37. Isabelle says:

    Thank you for sharing again with us this really funny technique. Now I know I have to go on with my ordering of ink cubes to have a good choice of colors.

  38. Linda Whitaker says:

    Hi Jennifer, you come up with such neat ideas for cards! Thank you so.

  39. Debbi S says:

    Love these cards. I struggle with mini cube inks, I find
    they tend to be drier than full ink pads. Perhaps I will
    try this brand.

  40. Kelly B says:

    Love these bright ink colors!

  41. Maria B says:

    Thanks for giving such clear explanations. Cha-cha-cha was fun.

  42. Sue D says:

    Fun and colorful cards.

  43. Sandi Calhoun says:

    I never thought to use my cubes this way. What a great idea!

  44. dancingcat says:

    I love mini ink pads because it makes it more affordable to buy every color. Great tip for the “ombre” stamping.

  45. Ann Kulseth says:

    You are amazing …. what fabulous inspiration and advice.

  46. What wonderful ideas and techniques. Thanks for sharing all this with us. Great inspiration, as always

  47. Lisa Tilson says:

    This is such a helpful video Jennifer, I have a couple of friends who find using mini ink cubes hard, they don’t get good coverage so I am sure this will help them. And what a great way to get the ombre look by taping them together (why did I not think of this?!). You always do this, give tips that seem so obvious when you show them, yet do not occur in real life, at least to me! Lovely cards as always – especially those little thank you notecards. Lisa x

Leave a Reply

Your email address will not be published. Required fields are marked *