Faux Acrylic Pour With Embossing Powder

Hi! Lately I have been seeing a lot of artists doing a technique called “acrylic pour.” The results are gorgeous and I have wanted to try it. Since I don’t have the supplies, I thought I would try to get a similar look using my cardmaking goodies! I am hoping you like it, too.

[All supplies are linked to multiple sources in the thumbnails at the end of this post. Multiple stores are also linked in the parentheses following the product name. Compensated affiliate links may be used at no cost to you.]

This is a technique you can do with basic supplies. For each piece, I created a “base” by gluing four Hero Arts Circle or Heart Infinity die cuts together. I then added a layer of VersaMark Ink (HA | SSS) and Hero Arts White Embossing Powder (HA | SSS). After adding heat – and while the piece was still hot – I added more powder. I did a total of five layers of white embossing.

Next I pressed various color of Hero Arts Dye Ink (HA | SSS) onto the cooled piece. I applied more heat, causing the color to soften and the white powder to come to the surface. I love this look!

The white “bubbles” and mixing of color reminds me of acrylic pour.

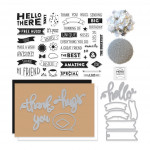
The “hugs” and other word dies cuts are from the new Hero Arts My Monthly Hero March Kit. Aren’t they beautiful?

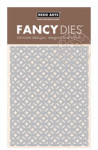
For all of the backgrounds, I used the new Hero Arts Bold Graphic Confetti Die (HA | SSS).

Each of my examples are a bit different, but show the fun looks that you can get with this simple technique.

If you are looking for more bold colors, you can try adding colored embossing powders. However, I stuck with white for these examples.

To add a bit of “movement,” I dragged a toothpick around in the hot embossing powder. This one is my favorite.

I mostly used green and blue inks because they are my favorites, but you can do this with any colors.

For more bold color, you can do two rounds of colored ink…

This next example is a bit different. I inked this one five times. You can see that when I used this much ink, the white started turning light pink.
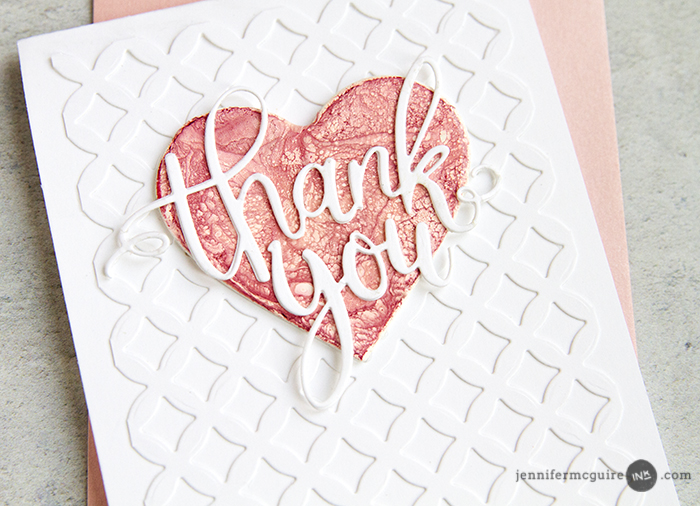
And finally… I have an examples showing you can do this technique and any die cut shape. This sentiment is also from the Hero Arts My Monthly Hero March Kit.

BLOG HOP

This post is part of a blog hop showcasing the Hero Arts My Monthly Hero March Kit. This kit has a large stamp set, many AWESOME dies, and more! The kit value is $70… but only costs $34.99! You can see all the details HERE. The kit is available for a limited time only – once it’s gone, it’s gone. And they sell out fast! The stamps and dies are not sold separately. (Remember that Hero Arts does now have a subscription option with FREE US shipping and $9.99 international shipping in case you never want to miss out on a kit. Find out info HERE.)

HERE is the kit. All this is valued at $70, but costs under $35…

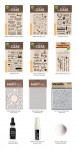
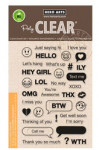
There are also many great new products available that coordinate with the kit. Worth checking out! You can find them all HERE.

The next stop on the hop is the blog of one of my favorite cardmakers – Yana Smakula. (You can always start at the beginning of the hop at the Hero Arts Blog.)

GIVEAWAY

Hero Arts is giving away a kit to a lucky blog reader – selected from the comments across all of the blogs in the hop. For your chance, leave a comment below and on all the blogs in the hop by 11:59pmEST on 3/11/18. (To leave a comment, head to my blog, scroll down to the bottom of this post and click the green “leave a comment” button. The winner’s name will be shared on the Hero Arts Blog. Hero Arts will reimburse the winner if they already bought the kit.)

SUPPLIES

Want to find the products I used? I have listed them below. (Compensated affiliate links used at no cost to you. Thank you! Affiliate and product disclosure can be found here. All products were personally purchased except those from Hero Arts. As always, this post was NOT paid for or sponsored.) Click on the icons below each product picture to go to a favorite store.

Hero Arts My Monthly Hero March Kit
[ HA ]
Hero Arts Additional Products
[ HA ]
Hero Arts Bold Graphic Confetti Die
[ HA | SSS ]
Hero Arts Text Me Stamp Set
[ HA ]
Hero Arts Circle Infinity Dies
[ HA | SSS | ELH ]
Hero Arts Hearts Infinity Dies
[ HA | SSS | ELH ]
Gina K Connect Glue
[ GNK | SSS ]
Hero Arts Dye Ink
[ HA | SSS ]
Therm O Web Purple Tape
[ SSS | ELH | THR ]
VersaMark Ink
[ HA | SSS | ELH ]
Hero Arts White Embossing Powder
[ HA | SSS ]
Hero Arts Heat Gun
[ HA | SSS | ELH ]
Cutting Board
[ AMZUS ]
Tim Holtz Tonic Mat
[ SSS ]
EK Success Tweezers
[ SSS ]
Tim Holtz Trimmer
[ SSS ]
MISTI Stamping Tool
[ SSS ]
MISTI Mouse Pad Insert
[ SSS ]
MISTI Bar Magnet
[ SSS ]


Leave a Comment

288 thoughts on “Faux Acrylic Pour With Embossing Powder”

  1. Linda says:

    I love watching your videos! I also appreciate your showing techniques using supplies from the craft room.

  2. Melinda says:

    I can’t wait to get home and try this technique! I love the big word dies. And the cards you made look amazing with this technique. I kit is one I would love to have. Thanks for the inspiration as always!

  3. Evelyn Larson says:

    Jennifer you are amazing.

  4. Heather DePasquale says:

    Love all your cards! So much easier to make several at once. Love this new kit! Can’t wait to try some of your techniques. Always inspirational! Thanks!

  5. LisaSays says:

    lovely results and clever technique ! I’m going to give it a try some day 🙂 thanks !

  6. Cynthia Cole says:

    Great technique with beautiful results!

  7. Annette Gordon says:

    What a great technique! And they look so great with the background cover plate die!

  8. Beth Holt says:

    I thought about starting acrylic pouring but then realized I have enough craft stuff and don’t need to start yet another crafting hobby! This technique is so awesome! You come up with the best ideas! Love the card kit! So versatile with endless possibilities!

  9. It amazes me how creative your brain is! Awesome technique! Must try ! I love this kit! It is definitely an everyday go to !

  10. Buffy says:

    This is amazing Jennifer! I’m totally doing Easter eggs this way on my cards! Thank you for the brilliant idea. Also love the Hero Arts word dies in this kit.

  11. Such a fun technique! I’ll have to give it a try. Great inspiration for the fabulous kit.

  12. What pretty results from this fun technique! Thanks for the great inspiration!!!

  13. ggnurse says:

    I almost bought the kit when it released, because I adore the font of the word dies. Decided to stick to my spending freeze, unfortunately! Your video reminds me of the UTEE technique I did with an electric skillet years ago & I can’t wait to do this version & maybe add in some of my huge assortment of beads, etc for the old technique!

  14. Ang says:

    I love this technique!

  15. KarinaB says:

    Wow!!! I Loved it! I can’t wait to try this techinique!!! As usual your ideas are brilliant!! Imaginig how great easter eggs will be with this techinique!

  16. Jeanne Beam says:

    Absolutely gorgeous cards. Love the embossing technique. Thanks so much for sharing…

  17. Lisa O'Reilly says:

    As usual you make the best cards and videos. Love your style!!

  18. Jeanne Beam says:

    Beautiful cards. Love the embossing technique. Thanks for sharing..

  19. Marianne says:

    Such a fun and easy technique with stunning results! Thanks for the inspiration!

  20. Kendra says:

    This is an interesting idea for a technique. I like how it sets off the sentiments really well. Something to explore!

  21. DenaAnn Schaufele says:

    Great look. Can’t wait for this kit to come.

  22. Ashley H says:

    I absolutely adore the acrylic pour technique. I cannot wait to try it. But when I saw the Hero Arts kit I immediately had to get it. I am super excited to try it out. Such a beautiful and wonderful things to play with in this kit. Hooray!

  23. Candy B. says:

    I am wondering how this technque would work with dye reinkers using drops of ink and moving those around. Looks like great fun! Thank you.

  24. Erica Ambrose says:

    I cannot wait to try this!

  25. Joyce says:

    This is a fabulous technique, love the kit, and that background confetti die is awesome!

  26. Amy O says:

    Beautiful and fun, Jennifer. And I love this month’s kit!

  27. Judy says:

    Jennifer,
    I like your Faux acrylic pour technique. I’ve used the Extra thick embossing powder to do this technique when making pendants for necklaces but this technique is quite easy. I never used ink on top and I love how that came out on the circle and heart especially when you used the wooden stick to move the embossing powder around on the card. Thanks for sharing another great technique.

  28. Ingrid den Hollander says:

    That is such a cool way to use embossing powders. And the word dies are great!

  29. Stephanie Z says:

    All your cards were great! Love the die words in this kit 🙂

  30. Carolyn S says:

    What an interesting technique that looks like a lot of fun since you get something g different every time. And the Hero Arts does are wonderful – super versatile!

  31. Linda Winterroth says:

    I LOVE, LOVE, LOVE this Hero Arts set. Your creativity shines, Jennifer, with your technique that made your beautiful cards. I will be buying this set!

  32. Marcia Scantlin says:

    I’ve never heard or seen this technique before – pretty amazing.

  33. So cool! Very creative of you to come up with this!!

  34. Deni says:

    So many layers! I just have to stop burning my fingers to try this. Love the new dies!

  35. Sheri K says:

    I adore this technique–so very cool!

  36. Beth A Myers says:

    Sweet cards! Can’t wait to test out some of my powders.

  37. Dorothy Knapp says:

    I just love this look. I have done double embossing powder in other ways, but this beats them all. I can hardly wait to have the time to do this. Thanks to you and Hero Arts.

  38. Debbie Ong says:

    Love the textured look of this technique!

  39. Carla Haase says:

    I have to try this technique right away. I can think of so many applications for using it. And thank you, Jennifer, for all of your posts. I am learning so much from you.

  40. Fonda Rush says:

    I’ve just learned about the acrylic pour technique. Your use of embossing powder creates some of the same looks I’ve seen. It won’t be long before I try this, too.

  41. MelissaF says:

    Wow, amazing cards with this fun technique and that bold graphic confetti background die cut is awesome!

  42. Jane M says:

    I have never seen that technique. Thank you for the tutorial! Your cards and technique are outstanding! I love the Hero Art Bold Graphic Confetti Die that you used.

  43. Aash B says:

    Beautiful, unique idea, and thanks for the chance to win!

  44. Barbara Walborn says:

    Great technique! I will definitely give this a try.

  45. cyndi morris says:

    Beautiful technique — it looks fun. I’ll be checking out the acrylic pour on YouTube. Thanks so much for keeping my head filled with ideas!

  46. Monica says:

    Thanks for yet another technique… you have ENDLESS ideas… IMPRESSIVE!! Thanks for sharing!

  47. Patricia Sakrismo says:

    Thank you again for a wonderful video! You seem to come up with something new all the time – thanks for sharing all your wonderful ideas!

  48. Kate B says:

    What a creative way to use cardmaking supplies! I love the finished look & will definitely be trying this technique out!!

  49. Tamara says:

    Your work never fails to inspire me to try new techniques! Thank you for sharing your creativeness!

  50. Teresa Doyle says:

    Absolutely amazing cards.

Leave a Reply

Your email address will not be published. Required fields are marked *