Faux Acrylic Pour With Embossing Powder

Hi! Lately I have been seeing a lot of artists doing a technique called “acrylic pour.” The results are gorgeous and I have wanted to try it. Since I don’t have the supplies, I thought I would try to get a similar look using my cardmaking goodies! I am hoping you like it, too.

[All supplies are linked to multiple sources in the thumbnails at the end of this post. Multiple stores are also linked in the parentheses following the product name. Compensated affiliate links may be used at no cost to you.]

This is a technique you can do with basic supplies. For each piece, I created a “base” by gluing four Hero Arts Circle or Heart Infinity die cuts together. I then added a layer of VersaMark Ink (HA | SSS) and Hero Arts White Embossing Powder (HA | SSS). After adding heat – and while the piece was still hot – I added more powder. I did a total of five layers of white embossing.

Next I pressed various color of Hero Arts Dye Ink (HA | SSS) onto the cooled piece. I applied more heat, causing the color to soften and the white powder to come to the surface. I love this look!

The white “bubbles” and mixing of color reminds me of acrylic pour.

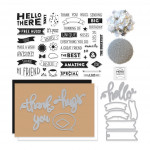
The “hugs” and other word dies cuts are from the new Hero Arts My Monthly Hero March Kit. Aren’t they beautiful?

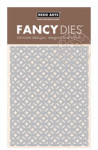
For all of the backgrounds, I used the new Hero Arts Bold Graphic Confetti Die (HA | SSS).

Each of my examples are a bit different, but show the fun looks that you can get with this simple technique.

If you are looking for more bold colors, you can try adding colored embossing powders. However, I stuck with white for these examples.

To add a bit of “movement,” I dragged a toothpick around in the hot embossing powder. This one is my favorite.

I mostly used green and blue inks because they are my favorites, but you can do this with any colors.

For more bold color, you can do two rounds of colored ink…

This next example is a bit different. I inked this one five times. You can see that when I used this much ink, the white started turning light pink.
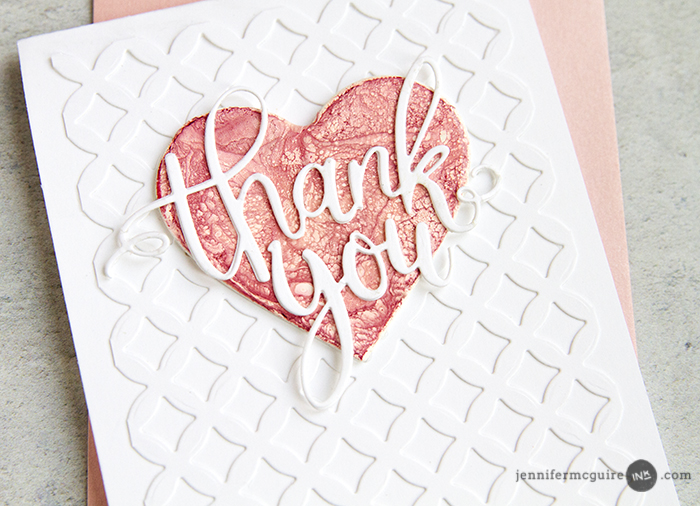
And finally… I have an examples showing you can do this technique and any die cut shape. This sentiment is also from the Hero Arts My Monthly Hero March Kit.

BLOG HOP

This post is part of a blog hop showcasing the Hero Arts My Monthly Hero March Kit. This kit has a large stamp set, many AWESOME dies, and more! The kit value is $70… but only costs $34.99! You can see all the details HERE. The kit is available for a limited time only – once it’s gone, it’s gone. And they sell out fast! The stamps and dies are not sold separately. (Remember that Hero Arts does now have a subscription option with FREE US shipping and $9.99 international shipping in case you never want to miss out on a kit. Find out info HERE.)

HERE is the kit. All this is valued at $70, but costs under $35…

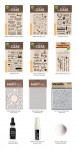
There are also many great new products available that coordinate with the kit. Worth checking out! You can find them all HERE.

The next stop on the hop is the blog of one of my favorite cardmakers – Yana Smakula. (You can always start at the beginning of the hop at the Hero Arts Blog.)

GIVEAWAY

Hero Arts is giving away a kit to a lucky blog reader – selected from the comments across all of the blogs in the hop. For your chance, leave a comment below and on all the blogs in the hop by 11:59pmEST on 3/11/18. (To leave a comment, head to my blog, scroll down to the bottom of this post and click the green “leave a comment” button. The winner’s name will be shared on the Hero Arts Blog. Hero Arts will reimburse the winner if they already bought the kit.)

SUPPLIES

Want to find the products I used? I have listed them below. (Compensated affiliate links used at no cost to you. Thank you! Affiliate and product disclosure can be found here. All products were personally purchased except those from Hero Arts. As always, this post was NOT paid for or sponsored.) Click on the icons below each product picture to go to a favorite store.

Hero Arts My Monthly Hero March Kit
[ HA ]
Hero Arts Additional Products
[ HA ]
Hero Arts Bold Graphic Confetti Die
[ HA | SSS ]
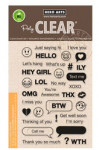
Hero Arts Text Me Stamp Set
[ HA ]
Hero Arts Circle Infinity Dies
[ HA | SSS | ELH ]
Hero Arts Hearts Infinity Dies
[ HA | SSS | ELH ]
Gina K Connect Glue
[ GNK | SSS ]
Hero Arts Dye Ink
[ HA | SSS ]
Therm O Web Purple Tape
[ SSS | ELH | THR ]
VersaMark Ink
[ HA | SSS | ELH ]
Hero Arts White Embossing Powder
[ HA | SSS ]
Hero Arts Heat Gun
[ HA | SSS | ELH ]
Cutting Board
[ AMZUS ]
Tim Holtz Tonic Mat
[ SSS ]
EK Success Tweezers
[ SSS ]
Tim Holtz Trimmer
[ SSS ]
MISTI Stamping Tool
[ SSS ]
MISTI Mouse Pad Insert
[ SSS ]
MISTI Bar Magnet
[ SSS ]


Leave a Comment

288 thoughts on “Faux Acrylic Pour With Embossing Powder”

  1. Monica Maier says:

    I love the pops of color the shapes add and the font of the dies are gorgeous. They are probably my favorite thing in the Kit!!!

  2. mj says:

    Beautiful cards. Love this kit!

  3. DancesWithHooves says:

    These turned out phenomenal! What an awesome technique! Thanks for sharing, and thank you so much for the giveaway opportunity!

  4. Isabelle says:

    As usual, your cards are gorgeous !!! I love this technique. It makes me think of a card presented by Laura Bassen in the Sparkle and Shine OCC, but she played with a colored embossing powder. It’s great to see that the white embossing powder gives also fantastic results. I’m now wondering what it would give with clear embossing powder, maybe on color paper…. well, now I know what I’ll be doing tonight – LOL !!!

  5. Marianne B in AZ says:

    As always, you have made such beautiful cards! I am a subscriber to Monthly Hero, completely due to the cards I had seen you make with the kits. Thank you for the great ideas you share and, most of all, reminding us to share handmade kindness

  6. Debbie LeMarbre says:

    I am trying this tonight, love the technique thanks Jennifer

  7. Teresa says:

    I have been looking at the acrylic pour videos too. I am impressed that you created a faux technique to mimic the cool look. I’m excited to give this a try. Thank you for sharing your creativity and inspiration. I look forward to your informational videos.

  8. Autism Journey says:

    Wow this is such a cool technique! I’ve never seen this before. Layering embossing powder always looks great especially on Die cut sentiments 😍 As always, the hero arts monthly kits are beautiful and jam packed! The price is fabulous. I love the new confetti panel Die. Thank you for all the amazing inspiration

  9. Karen D Murphy says:

    Wonderful technique. I love the colors and the marbling effect.

  10. joy meadows says:

    What a great technique! Love each and every card you made with it. Thanks for another awesome video.

  11. Gail Scott says:

    Thanks for the blog hop and for showing us your Fabulous work – have a blessed day Jennifer

  12. Cheryl Robertson says:

    Interesting technique and one I’ll definitely try. The new kit looks like a good one. Love the dies included.

  13. Elly Booij says:

    Beautiful cards. Love the kit.

  14. Sue says:

    Oh my gosh, you are so amazing!!! So simple but so beautiful!!! Love this technique and love love the word dies and graphic background die!!!!! Thank you for sharing!!

  15. Kathy S. says:

    Even when I don’t think I’ll be interested in doing what you’re showing, I always am. I LOVE that confetti die! Thanks, Jennifer!

  16. Sabrina Schaar says:

    Beautiful technique, thanks for sharing

  17. dancingcat says:

    This is such a unique technique, I really like it. Your cards are beautiful and Hero Arts did a fantastic job with this release.

  18. Tina Ricaurte says:

    That is a VERY useful kit collection! What great items all packed into one place!

  19. Laurie Brown says:

    Oh what a fun technique!!! Can’t wait to give it a try!!! Beautiful cards Jennifer!!

  20. Helen Potter says:

    Love this technique. Thanks Jennifer, the cards are beautiful.

  21. Linda Hornung says:

    Thank you once again for sharing your techniques! I love what you do with heat embossing.

  22. Sharon Perehudoff says:

    Gorgeous cards and technique! Such an amazing kit. Jennifer thanks so much for the inspiration on doing layering with embossing powder.

  23. MaggieB1983 says:

    Gorgeous, gorgeous, gorgeous Jennifer!! LOVE the greens and blues together (which was always a favorite of my mothers too) and the marbled effect you achieved by dragging and swirling a toothpick through the hot powders. I’ve never heard of Acrylic Pouring but I’m already in love with the faux version. Thanks so much for sharing and I hope you have a wonderful week. ~HUGS~
    #kindnessmatters

  24. Rita Swanger says:

    Such an awesome and unique technique!

  25. Barbara Lambe says:

    Beautiful cards,thank you for the inspiration.

  26. k_dragon16 says:

    This is such a cool technique! 🙂 I love seeing new ideas for cards. I’ll definitely have to try this!

  27. susie sonnier says:

    Cool!!!!

  28. Kat says:

    You are so inspiring. Thank you for sharing your talent with us.

    Hoping you have a fabulous week!

  29. Judy says:

    Very striking results with this technique and I love this month’s Hero Arts kit!

  30. Dana N says:

    I’m in love with that technique. I’ll be spending my afternoon playing with my embossing powders and ink. Thank you for showing such a neat technique.

  31. Mari Flyktman says:

    Wow, how cool technique, have to try it right away ☺️

  32. Sue D says:

    Fabulous–you sure come up with some great techniques.

  33. Elizabeth Roberts says:

    I have wanted to try this technique with the acrylic paint, and now I can’t wait to try it with my card making as well. Thank you for sharing.

  34. Viola Leary says:

    Jennifer, thanks for the info on the faux acrylic pour. Ive made cards with small pours that i do on white matboard. A great way to add pours to your cards..

  35. Ditte Nue says:

    Looks great with the Mix of the random Colorado on the die cuts on the controlled White background!

  36. Liz McAllister says:

    Wondering how oxide and pigment inks woudl behave

  37. Tara Prince says:

    Beautiful cards! I love the die in the background!!

  38. Phyllis Freese says:

    Beautiful cards! I love how the color just pops on that beautiful background of white on white.

  39. Stacey says:

    Super cute cards, I’m loving this kit!

  40. Julia D. says:

    Wow! What a cool technique – you’re so creative and innovative. Thank you for another great idea I’d love to try! And thank you to Hero Arts for the chance to win!!

  41. Christina says:

    What a great idea! LOVE the way this technique looks and the way the dies pop against it.

  42. Naama E says:

    Oh wow, this is FANTASTIC! I’ve been playing around with embossing powders lately but would never think of adding ink! Definitely trying this in my next play time 🙂 I really love how it worked on the word die – not that it’s not gorgeous by itself, this kits word dies are stunning – but this is such a unique touch. Thanks for the inspiration, can’t wait to try this! xx

  43. Vikki H says:

    Stunning effect for a marbling look. Thanks Jennifer for all the ideas!

  44. Jodi says:

    Wow! Such a cool technique…will definitely have to give this a try! Thanks for all the inspiration! ❤️

  45. Julie says:

    Interesting technique. And the kit…. Love the Everyday Icons, shimmer spray, stencil, white detail embossing powder, and I need to replace my Unicorn ink.

  46. J just love everything you do!! What a blessing you are!!!

  47. Terri Mariani says:

    You are so creative to come up with this technique! Thanks for all the ideas you share with us!

  48. Debbie P says:

    Wow! Wow! You are so creative. Love your cards and technique. Thank you for sharing. I love hero arts new kit.

  49. Laurie Fleuette says:

    I love this technique! Thank you for the inspiration.

  50. Juana Vega says:

    wow…. such a nice technique, you always help me see the Hero Arts kits in a totally different way with so many possibilities. Thanks

Leave a Reply

Your email address will not be published. Required fields are marked *