Alcohol Blend Coloring

Hello! I am back after a quick trip away (heavenly!)… and have a fun alcohol blend coloring technique for you. I am really liking the unique looks you can get with this technique. I have lots of examples!

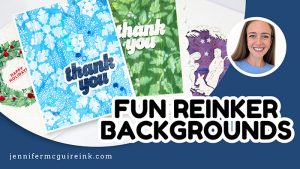
Alcohol Blend Coloring Video by Jennifer McGuire Ink

[All supplies are linked in the text below and in the thumbnails at the end of this post. Compensated affiliate links may be used at no cost to you.]

I have shared many videos featuring alcohol ink in the past. If you haven’t seen them, check out my list below. Today’s video shares a “step-it-up” technique for alcohol inks… using a Tim Holtz Alcohol Ink Blending Fillable Pen with Alcohol Blending Solution to “lift” color and add it to another project. This is SUCH fun!

** Be sure to watch the video above to see how I filled my Tim Holtz Alcohol Ink Blending Fillable Pen with Alcohol Blending Solution. Also, all of my cards started with a background that I created with Tim Holtz Alcohol Ink on Tim Holtz Heavyweight Yupo Paper. ** Tim is brilliant – such cool products.

My first example features the new Pretty Pink Posh Autumn Wreath Stamp Set. I white heat embossed my images on a alcohol inked background. I then “colored” in the image with my Tim Holtz Alcohol Ink Blending Fillable Pen with Alcohol Blending Solution. This “lifts” the color away. (I was able to apply the color to another card… two cards down.)

Alcohol Blend Coloring Video by Jennifer McGuire Ink

I love the non-glossy, muted look that is left behind in the image…

Alcohol Blend Coloring Video by Jennifer McGuire Ink

Here is another card featuring the same technique. This time the sentiment is from the Pretty Pink Posh Thankful For You Die… and I stamped a greeting on my envelope from the Pretty Pink Posh Kind Stamp Set.

Alcohol Blend Coloring Video by Jennifer McGuire Ink

Here is the card I created with the “lifted” ink. I heat embossed the images from the Pretty Pink Posh Autumn Wreath Stamp Set… and added color that I lifted with the Tim Holtz Alcohol Ink Blending Fillable Pen with Alcohol Blending Solution from the cards above. This is a great way to create more than one card at a time!

Alcohol Blend Coloring Video by Jennifer McGuire Ink

I really like the look of the color with the gold embossed outlines…

Alcohol Blend Coloring Video by Jennifer McGuire Ink

My next card shows how this technique works with images with large open areas. Onto my alcohol inked background, I white heat embossed images from the Pretty Pink Posh Anemones Stamp Set. I removed color from the flowers using the Tim Holtz Alcohol Ink Blending Fillable Pen with Alcohol Blending Solution. Once I completed this, I picked up a bit of green alcohol ink from a scrap using my Tim Holtz Alcohol Ink Blending Fillable Pen and added it to the leaves on my card. (You can lift, remove, move, and transfer color with this pen.)

Alcohol Blend Coloring Video by Jennifer McGuire Ink

I added a “thankful” die cut using the Pretty Pink Posh Thankful For You Die and Tonic Gold Mirror Cardstock. The “for you” is from the Simon Says Stamp Tiny Words Stamp Set.

Alcohol Blend Coloring Video by Jennifer McGuire Ink

Next up is a pair of cards featuring the lovely SSS Altenew Dainty Sprig Combo. This shows that you can do this technique with multiple colors of alcohol ink on the background. For a bit of interest, I added a Simon Says Stamp Marilyn die cut to the notecard, too.

Alcohol Blend Coloring Video by Jennifer McGuire Ink

I am crazy about this green alcohol inked background! And I like how this technique creates a soft, detailed image… from the SSS Tim Holtz STAMPtember 2018 Combo. Swoon!

Alcohol Blend Coloring Video by Jennifer McGuire Ink

Here is the “partner” card. Notice the stripes in the background. I created that with one of the stencils included in the SSS Tim Holtz STAMPtember 2018 Combo.

Alcohol Blend Coloring Video by Jennifer McGuire Ink

This last pair of cards shows a variation of this technique. And I like these results the best! I used products from the new Simon Says Stamp Sketched Flowers Kit (it is a good one)… but you can buy them separately if you prefer.

This time I stamped the flower image (from the kit or the Simon Says Stamp Sketch Flowers Stamp Set) with Tim Holz Alcohol Lift Ink. This “lifts” the color away in the shape of the stamp. I then “colored” in the image with my Tim Holtz Alcohol Ink Blending Fillable Pen with Alcohol Blending Solution as I did on the other examples. Once complete, I white heat embossed the image in the same place. This gives very clean results.

Alcohol Blend Coloring Video by Jennifer McGuire Ink

I am crazy about that bold color! The sentiment is from the Pretty Pink Posh Thankful For You Die and Simon Says Stamp Tiny Words Stamp Set.

Alcohol Blend Coloring Video by Jennifer McGuire Ink

And here is the partner card. The “thanks” is from the Pretty Pink Posh Thanks Leaf Shaker Die.

Alcohol Blend Coloring Video by Jennifer McGuire Ink

RELATED VIDEOS

Here are a few other Alcohol Ink videos you may find helpful…

SUPPLIES

Want to find the products I used? I have listed them below. (Compensated affiliate links used at no cost to you. Thank you! Affiliate and product disclosure can be found here. All products were personally purchased except those with an asterisk or from Pretty Pink Posh and Simon Says Stamp. As always, this post was NOT paid for or sponsored.) Click on the icons below each product picture to go to a favorite store.

Pretty Pink Posh Autumn Wreath Stamp Set
[ SSS ]
Pretty Pink Posh Anemones Stamp Set
[ SSS ]
Pretty Pink Posh Kind Stamp Set
[ SSS ]
Simon Says Stamp Tiny Words Stamp Set
[ SSS ]
Simon Says Stamp Sketch Flowers Stamp…
[ SSS ]
SSS Altenew Dainty Sprig Combo
[ SSS ]
SSS Tim Holtz STAMPtember 2018 Combo
[ SSS ]
Pretty Pink Posh Thankful For You Dies
[ SSS ]
Pretty Pink Posh Thanks Leaf Shaker Die
[ SSS ]
Simon Says Stamp Marilyn Die
[ SSS ]
Simon Says Stmp Sketched Flowers Kit
[ SSS ]
Tim Holtz Heavyweight Yupo Paper
[ SSS ]
Tim Holtz Alcohol Ink Blending…
[ SSS ]
Microbrushes
[ SSS ]
Tim Holtz Alcohol Ink
[ SSS ]
Tim Holtz Alcohol Blending Solution
[ SSS ]
Tim Holtz Alcohol Ink Storage Tin
[ SSS ]
Tim Holz Alcohol Lift Ink
[ SSS ]
VersaMark Ink
[ SSS ]
VersaFine Onyx Black Ink
[ SSS ]
Distress Oxide Inks
[ SSS ]
Mini Ink Blending Tool
[ SSS ]
MISTI Stamping Tool
[ SSS ]
MISTI Creative Corners
[ SSS ]
MISTI Mouse Pad Insert
[ SSS ]
MISTI Bar Magnet
[ SSS ]
Tim Holtz Tonic Glass Media Mat
[ SSS ]
Gina K Connect Glue
[ SSS | GNK ]
Anti Static Powder Bag
[ SSS ]
Hero Arts Heat Gun
[ SSS ]
Gina K Fine Detail White Embossing…
[ SSS ]
Altenew Platinum Embossing Powder
[ SSS ]
Sketch Copic Markers
[ SSS ]
Neenah Classic Crest 110lb Cardstock
[ SSS ]
Tonic Gold Mirror Cardstock
[ SSS ]
Therm O Web Purple Tape
[ SSS ]


Leave a Comment

40 thoughts on “Alcohol Blend Coloring”

  1. Gabi says:

    That was great Jennifer. Thank you. It’s so good that you can do two cards at once using this method.

  2. Mindy Drummond says:

    Wow just WOW!! These cards are stunning and getting 2 for 1 (so to speak) is awesome. I just received my first Tim Holtz Alcohol Inks and Yupo paper and can’t wait to get started on making backgrounds with them, the colors you used on these definitely will be inspiration for mine. Now I need to order the “lift” supplies and get to making. Thank you for sharing and the video as always you do inspire me!

  3. Barbara Smith says:

    That was fantastic! I really enjoyed your video. All of your examples are gorgeous, and I am excited to try the techniques.

  4. valchic says:

    I just love to learn a new technique.These are so fun Jennifer.Thanks so much for your detailed hints in sharing.

  5. Regine says:

    Absolutely beautiful cards, so vibrant. Love all of them! Thanks for all your fabulous videos.
    I think Alcohol inks just made it onto my Christmas wish list! 😉

  6. Stephanie Mayer says:

    Thanks for the sharing these alcohol ink techniques. I’m excitedly waiting for my kit to arrive. As always your videos are very informative and have clear instructions.

  7. Ellie says:

    I love them all but I am a little confused – how is the alcohol lift ink different from the blending solution? Are they doing the same thing?
    Thanks

  8. Candy says:

    Wow—you are the yoda of card making!

  9. Wow! These are gorgeous!! Thank you so much for sharing them with us 🙂

  10. terrie rodrigue says:

    I had to come to your blog to see the close-up of those beautiful background…
    I also like the technique that you did fantastic results…thanks you so much for sharing it
    well done as always.

  11. maria f. says:

    So. Very. Cool.
    You are a genius!

  12. renee milner says:

    These cards are so gorgeous and they look like a lot of fun to make 🙂

  13. Jean Marmo says:

    Thank you so much for sharing this!!

  14. Jean Chaney says:

    Loving this technique. Wonder if I could get the same results with an extra Copic colorless blender that I have?

  15. Harriet Herrington says:

    A great video, thank you!

  16. JUDITH DALEY says:

    Jennifer,
    These cards are sensational. I really like the idea of pulling off the color and using it on another card to have two effects with the same stamp. Love my Tim Holtz alcohol inks and the Yupo paper is fantastic. I was wondering where you purchase the plastic window sleeves for your ink samples. I downloaded the ink cards you provided for my Oxide inks but having problem finding those window pockets. Thanks again for all your great tips.

  17. Kim H. says:

    Your cards are exquisite!! I love how you explained the lifting of the alcohol ink from one card and used it on a different one! How frugal! The colors you chose for the alcohol blending are so pretty together. Just lovely!!! ♥

  18. Cindy says:

    Love, love, love! So inspiring! Thank you.

  19. barbara lassiter says:

    These are some of the best alcohol ink cards I’ve seen. The alcohol ink backgrounds are usually very bright and muting them down with these methods gives more variety for their use. I had previously ordered this refillable pen and I’m waiting for it to arrive and thank you for this timely video. I knew it would be good to have this pen and you definitely helped with ideas for it’s use.

  20. Donna Phelan says:

    Dang! What a waste of coffee tee hee, that was my favorite background too! These are beautiful and unique! I do have a few alcohol ink refills, yet I never use them. I love the Fall colors, so pretty!

  21. Jonie Isenberg says:

    JENNIFER, THERE WAS ONE MORE PRODUCT I’M TRYING. DONNA DEWBERRY PAINTING. THE FIRST THING SHE DEMO’D HOW TO PAINT WAS A PINK ROSEBUD. I IMMEDIATELY SAID TO MYSELF THAT I’VE MADE THOUSANDS OF THESE WITH CAKE FROSTING SO IF I CAN’T PAINT ONE I’M NOT WORTHY TO CALL MYSELF A CRAFTER. IT’S SO MUCH FUN. I’M ALSO LEARNING BRUSH LETTERING. STILL DOING HOMEWORK BUT I THINK IT WILL BE A SUCCESS.
    NOW, ABOUT A NICE TRIP TO CALIFORNIA. YOU ARE ONE LUCKY LADY. YOU CERTAINLY DO HAVE A SWEET HUSBAND. I HAVEN’T BEEN ANYWHERE IN SO LONG. ACTUALLY, I WOULD PREFER NOW TO SIT IN MY CHAIR AND NOT WORRY ABOUT MONEY. IF I DIDN’T FEEL GUILTY FOR NOT CONTACTING THE PRESIDENT, A SENATOR, OR CONGRESSMAN, ABOUT THEIR PROGRESS OF RESTORING THE POSSIBILITY OF MAKING A PROFIT IN OUR PHARMACY, WOULD BE A RELAXING DAY. MY PANIC ATTACKS SEEM TO COME MORE FREQUENTLY NOW. OH DEAR, YOU SHOULD ONLY BE REMEMBERING YOUR TRIP. I AM SO HAPPY FOR YOU AND HOPE YOU HAD A WONDERFUL TIME. MY SON TAKES HIS WIFE TO DISNEY IN ORLANDO. THEY LOVE IT. I’LL NEVER UNDERSTAND ADULTS AND DISNEY. IT MUST BE GREAT BECAUSE THEY GO A LOT.
    JONIE

  22. Maureen Reiss says:

    Gorgeous cards!!! Awesome technique!! TFS

  23. Debbie P says:

    WOW! Your tips are fantastic. Your cards are beautiful. Love your videos. Thank. You .

  24. Geri S says:

    Fabulous! Terrific cards and video, thanks!

  25. Suzi Metcalfe says:

    I do have a stack of backgrounds that DGD and I did using photo paper. Some of them are really nice. I don’t have the pen, but I have the microbrushes. That means I can give this a try. I do love trying all these new techniques. Thank you!

  26. Oh my goodness! What gorgeous cards and what great techniques. I have one of those pens and haven’t filled it yet, now I have a real reason to fill it. I have used a water brush for painting with alcohol inks before, in fact it was my first introduction to alcohol inks many years ago and we used it to paint onto an acrylic sheet printed with a pattern. Turns out beautiful. But this is so versatile and I totally love the look you get from it. Guess I need to pull out some of my backgrounds and play. Thanks for another fabulous video.
    Glad to see you back and rejuvenated, you are back with a bang!

  27. Theresa Petermann says:

    Amazing process again. Love that you figured out to use the color you picked up to create a second card. My blender pen hasn’t been out for a while. Time to get it out to play again. thanks as always for sharing.

  28. Helen says:

    Thanks for another great alcohol ink technique video, Jennifer. The color results are so rich and the images/sentiments so beautiful using the combination of blender pen and heat embossing. Thanks for these inspiring examples.

  29. Charlotte C says:

    I think you’ve got me this time and I will have to try alcohol inks. Stunning cards with mega wow factors. Thank you, Jennifer.

  30. Henriëtte says:

    Great that you had a heavenly minibreak, you deserve that!
    When I got the mail about the post I thought that it was vellum you used on the alcohol ink backgrounds. And then I was curious how you did that witout cutting everything by hand.
    Gladly it turned out to be an awesome ( for me new) technique that is so easy but so stunning! Thank you so much Jennifer for the great things you always bring us!

  31. Isabel Clemente says:

    Dear Jennifer. You really do inspire every crafter. I have learnt a lot of techniques thanks to your youtube videos. I want to make a question in this particular technique. Every time I used my heat gun with yupo paper, the regular one, I almost melted the paper, so I had to be careful. Do I have to use a heavier one to be able to do some embossing on top of it?. Thanks a lot!

  32. Dolly says:

    Hi Jennifer, I have the alcohol ink pen and never used it. Now I can’t wait to go to my craftroom and start using it. Thank you for this video and sharing your beautiful cards.

  33. burkie99 says:

    I want to let you know how much I enjoy watching your videos!!! I don’t get as much time as I would like to create cards, but definitely keep your techniques in mind when I do. Do you have a specific way of keeping your mini ink blending tool pads separated by color? I have seen that with the ink cubes the foam circle will fit in the bottom of the cube, but don’t know if you could suggest a way to keep colors marked so you don’t have to have a blending tool for each color.
    Thank you. Have a great weekend.

  34. Toni C says:

    Great technique! The cards are so pretty.

  35. These cards are super pretty, Jennifer, and your tutorial fun and easy to follow. Thank you.
    I hope you are feeling rested and relaxed after your mini break. Take time to look after you!

  36. MargoS says:

    Your cards are so beautiful as always. Thank you Jennifer for another great tutorial and for being so inspiring.
    Glad you enjoyed your mini break.

  37. Carol M.D. says:

    Beautiful cards Jennifer. Autumn is near, and time to do some Fall colors, like you did on some of your cards. Time to get out my straws 🙂

  38. Daria says:

    These are beautiful. I love that you can use the ink you remove from one image to color in another one. Very cool.

  39. durandconnie says:

    Bloomin’ Fantastic!
    Lovin the style, hues, …everything! It’s so ‘eye catching’.

Leave a Reply

Your email address will not be published. Required fields are marked *